 |
Yes, actual sewing has been absent for a while. I have managed to get my machine out of storage from moving house into its own room, meaning I can get on with finishing my quilt! In April I posted the quilt top that I had pieced together. Since then I had a go at some free motion quilting practice (and stay at home restrictions have lifted as well, so this isn't really in quarantine any more, but I felt I should carry on with the theme).
Though piecing the quilt top together took a fair amount of time because of all the angles, quilting it has taken a lot longer. Though I haven't fully completed my quilting, I thought I'd share how this has evolved so far.
My quilt measures just under 1.5m/60" each way as a square. I am using Liberty quilting cotton (no longer in stock, but from Sewbox at a reduced cost of £15 per m) for the backing, which is not wide enough. I have 3m, which I have cut in half, leaving two 1.5m strips, which I then stitched together to create a square that is slightly larger than the quilt top. I laid this out on the floor and basted it to the batting, which was a cotton batting from Minerva crafts. I could purchase it in a large size, so I had plenty (with enough to spare for a smaller quilt as well) for £23.99 in total. I chose this because I thought it would last well, wash well and it was made with natural fibres. I used a temporary spray adhesive to baste the backing to the batting and I then basted the quilt top to the batting using the spray, securing further with curved safety pins.
Then came the quilting. I chose a thread that matched the main colour of the quilt top. It blends in well with the backing, which has a busy design, as well. (I deliberately chose this backing for this purpose). I also kept in the walking foot that I used previously, as I was starting with straight lines. This quilt has a lot of 'negative space' (basically a lot of the quilt without design) leaving lots of room for quilted stitching design. In fact, I chose to only stitch in the ivory section, leaving coloured parts unquilted. There are a few of the negative space parts that are not quilted as well, to separate out the sections.
I echoed the straight lines and arrow design in the negative space. This took some time as I measured these out each time to match the existing lines and arrows. I only have a regular sized sewing machine - the Janome 525s/7025, and it certainly does not have a large inner space for quilting. There are lots of tips on how to quilt on a smaller machine, including rolling up at the sides. I haven't found this to be as effective as the 'stitch and stuff' technique. Basically, you can always manage by stuffing through what you need. It does require a bit of man handling at times, but has been fine so far, even for a novice quilter like me.
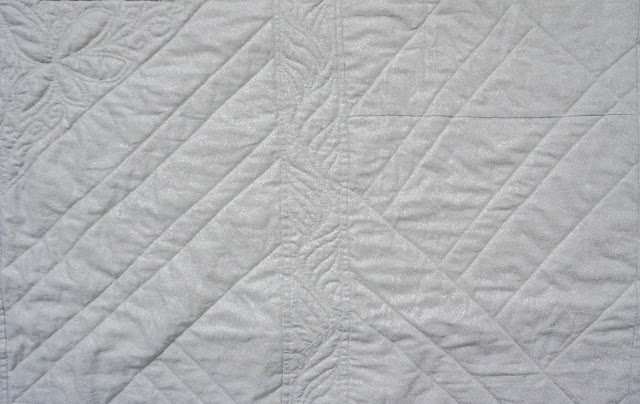
Then came the task of filling these in with free motion. I chose designs that I could see featured a lot on the Liberty fabrics; vines, leaves and paisleys mainly. Most of these filled in bars and columns of varying sizes, where I used echoing to fill the space and keep movement. The most successful ones are the long columns in between the arrows which have a ferny design.
I had some unusual larger sections which I filled with flower design, that I also quite like (top left here).
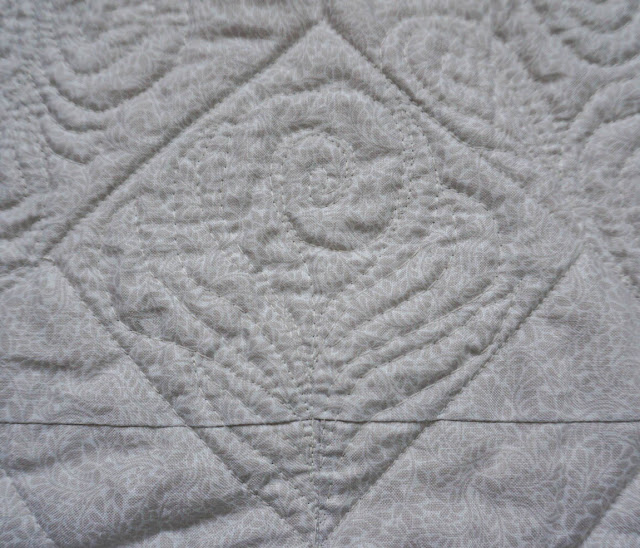
Plus one area that I built up to feature a rose.
These photos have been edited to give a better idea of the stitching, so they aren't quite representative of real life. What you can see however is how much the seams still show. In most areas I've tried to incorporate this into the design, but it isn't always possible and still stands out (lesson learned for the future).
My next steps now are to finish the last section of negative space, make the binding (urgh) and then attach it to the edges.


No comments:
Post a Comment